The amazing thing about quilting is that not only does your time and effort result in beautiful works of art, but it can also lead to some pretty terrific friendships!
Please allow me to welcome the newest member of our quilting journey, April! April has decided to join us and I am estatic that she is! I met April just this past weekend at my favorite store -- yep, JoAnn Fabrics. We met by chance when she asked if I was a quilter and the conversation started from there and lead to our project. April is a welcome addition and I am looking forward to getting to know her better as I hope you are as the weeks progress.
Today we begin Block Three -- can you believe it! See how time flies when you are quilting?!?
I am excited for us to begin this block as it will introduce a new element in our piecing, the half block square. A half block square is a very simple design element that will add dimension to our project.
The fun thing about these blocks is that once you learn the basics of the block construction you can experiment with the design and incorporate more or less fabric prints into the final piece.
For the Churn Dash Block you will use four fabric selections. For this block I chose fabrics in greens and blues. The end result was very cheery!

Let's get started on our block - shall we?
First the cutting. For the Churn Dash Block we will use four fabrics -- Fabric A, Fabric B, Fabric C, and Fabric D.
Label your fabrics (mentally or on your pattern instructions) and cut the following:
- Fabric A - (2) large squares 4 7/8" x 4 7/8" and (1) small square 4 1/2" x 4 1/2"
- Fabric B - (4) rectangles 4 1/2" x 2 1/2"
- Fabric C - (4) rectangles 4 1/2" x 2 1/2"
- Fabric D - (2) large squares 4 7/8" x 4 7/8"
- Remember, you will cut this quantity for each block and you are constructing (2) blocks - one for you and one for your block buddy
First we will construct our half square triangles and our half block squares, then we will assemble the units into our three rows that comprise the block.
Are you becoming a pro at assembling the half square triangles yet? Mastering the half square triangles opens a world of versatility when constructing quilt blocks and quilt designs.
- Construct four half square triangles by placing (1) Fabric A and (1) Fabric D 4 7/8" square right sides together and using a ruler mark a diagonal line from the upper left hand corner to the lower right hand corner of the square on the "wrong side" of the fabric.
- Stitch a 1/4" seam on each side of the drawn line
- Place (1) Fabric B and (1) Fabric C - 4 1/2" x 2 1/2" rectangle right sides together
- Join by stitching a 1/4" seam to form a half block square.
- Repeat until you have constructed four half block squares
Separate the units by cutting along the drawn line.
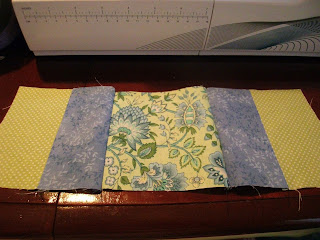
Construct four half block squares:
 |
| Completed Half Block Square |
Once you have constructed all the half square triangles and the half block squares, press your seams to avoid lumping and bulk in your finished block and then we will assemble the rows that comprise our block.
The Churn Dash Block is comprised of three rows. For the first row you will join (2) half square triangles with a half block square unit between them.
 |
| Layout for Row One |
 |
| Row One- Assembled |
For the second row you will assemble the row using (2) half block squares with (1) plain 4 1/2" square in the center. Pay close attention to the direction of your half block squares for proper pattern flow.
 |
| Row Two - Assembled |
Assemble row three by joining the remaining (2) half square triangles with the remaining (1) half block square.
 |
| Assembly Layout for Row 3 |
Once all three rows have been assembled you can begin assembling the final block by joining rows one and two - using a 1/4" seam allowance and finally adding row three to the bottom of row two using a 1/4" seam allowance.
 |
| Assembling the Block by Joining the Rows |
 |
| Completed Churn Dash Block |
Isn't quilting fun? I hope you are all enjoying this project so far and that you are finding an appreciation for the art of quilting. I would love to see some of your finished blocks, please email me pictures as you are able and I will share them with eveyone.
Be on the lookout for block buddy assignments, block instructions and templates in your emails later today for the Churn Dash Block and happy stitching ladies!
As Always, In Stitches,
Jan


No comments:
Post a Comment