Welcome

A heartfelt welcome to all who visit this blog. A Stitch Among Friends is designed to share basic quilting techiques with those of you who have always wanted to try your hand at this very rewarding pasttime. You don't have to have any experince quilting in order to follow along, just a willingness to try, share your results, and to fellowship with those taking this journey together. I am not a professional quilter and by no means claim to be. I simply enjoy working with fabric and watching to see what beautiful artwork results from the time I spend at my sewing machine.

We hope you will join us as together we build upon our skills and our friendships

Thursday, April 12, 2012

A Tisket A Tasket...Time to Make a Basket

In preparing for our next block, I took a few moments to reflect on why I love quilting so much.  There are so many reasons to be honest and probably way to many to list on this blog but the simple truth can be summed up by a line I read in a little quilting book my daughter gave me over the holidays. 

"We stitch hoping our lives, our personalities, our struggles, and our joys will find a place of remembrance in the minds and emotions of others." (The Quilt of Life, Mary Tatem)

The more I read that line, the more I knew that is the reason I quilt.  It is a deep desire to be remembered long after my journey on earth has passed.  It is my truest hope that by giving the gift of a quilt, or even lessons in quilting, that somehow I will have made an impact on the life of another.  A footprint on their heart that will long remind them of me and how much I loved them.

What draws you to quilting?  Is it that same desire to be remembered?  Is it love of creativity?  Have you thought about what quilting means to you or what it may come to mean to you?  I hope that you have...

Block Four is the Basket Block and arrived just as we were celebrating the Easter holiday.  It is a fun block that results in a charming pattern used for centuries in traditional and sampler quilts.


I must confess that before this project, I really had not found a desire to construct the Basket Block.  I don't know why really because now that I have made one I find myself designing other projects using the charming pattern and using a variety of fabrics to create different looks.

For this block you will need a minimum of three fabrics.  I say a minimum because as you become more experienced or if you have a sense of adventure, you can incorporate additional fabrics into the pattern to enchance the "flowers" or contents of the basket.  Imagine substituting a secondary print or soft color amount the floral print I used here...

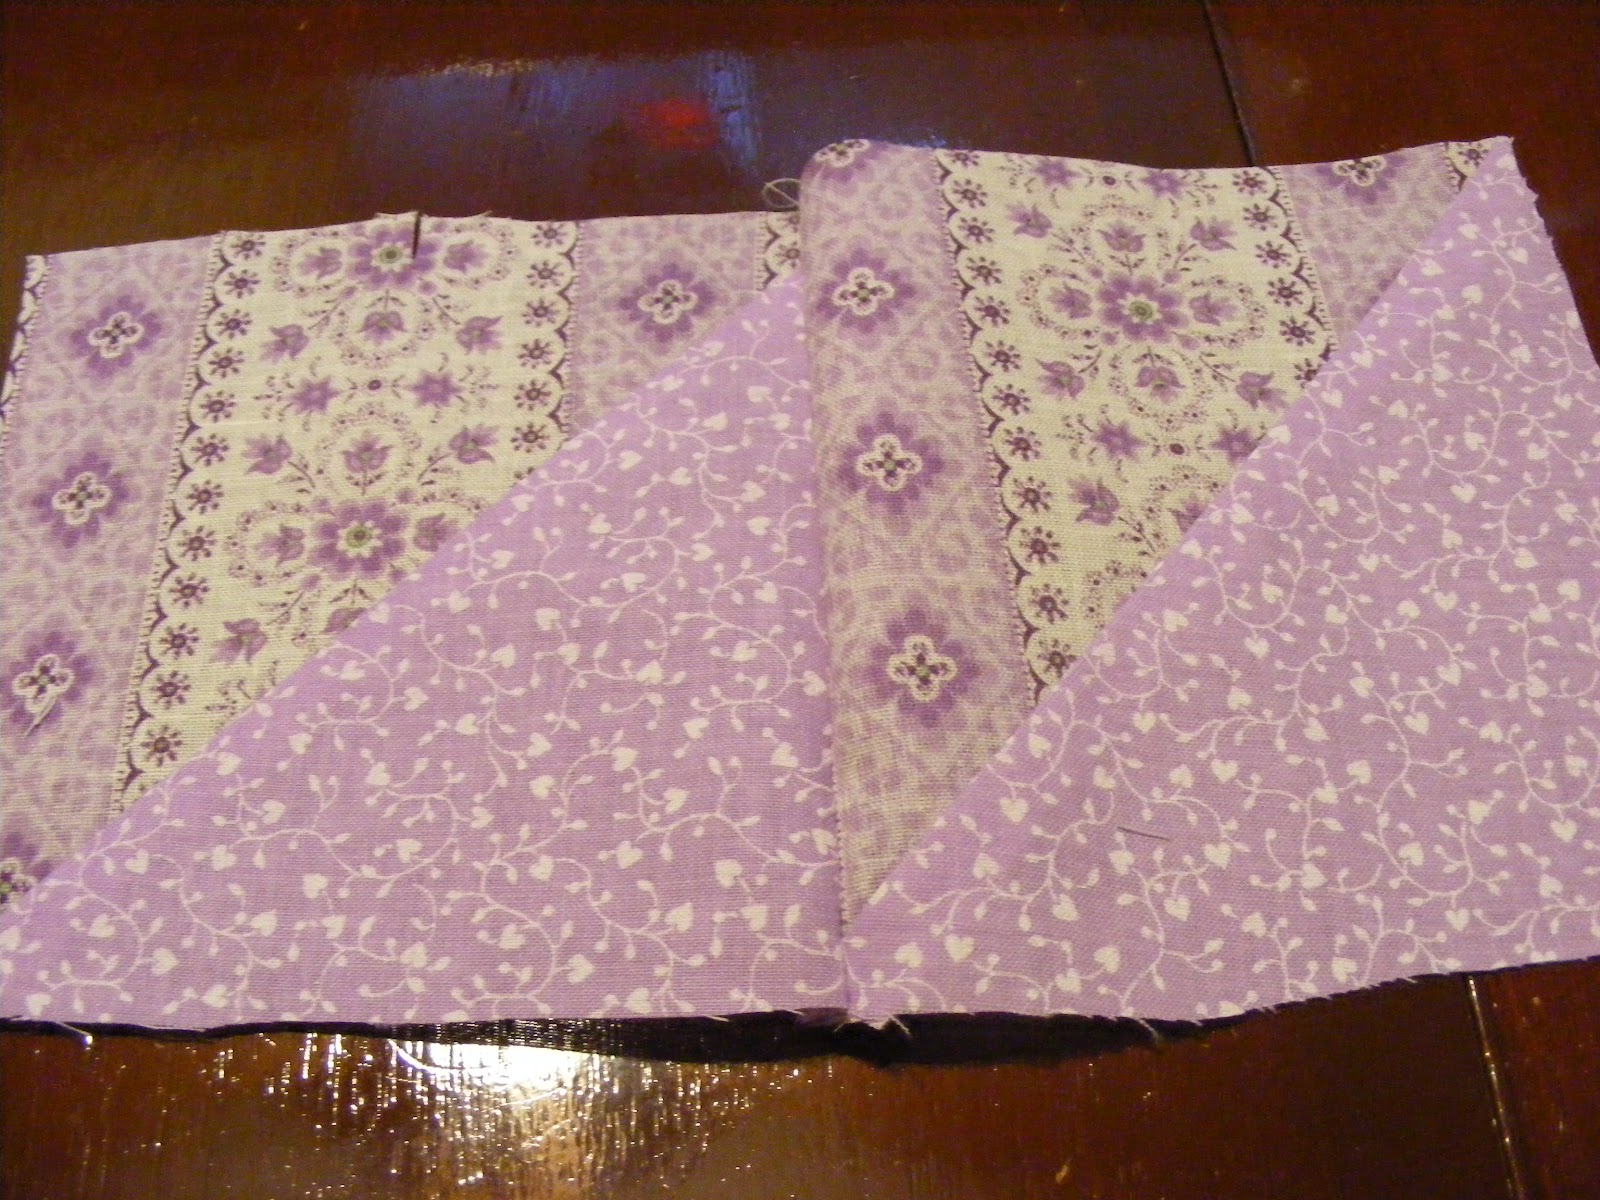
The materials I used where a soft ivory print for the background (Fabric A), a bright green and pink floral for the "contents or flowers" of the basket (Fabric B) and a woven basket look print for my basket (Fabric C).


To complete (2) 12 1/2" blocks you will need no more than 1/4 yard of each print and you will have some fabric left over.  (Tip:  keep folded scrap material together in plastic Ziploc storage bags for ease of searching your fabric "stash").

Cutting the Fabric

From Fabric A - Cut the following for each 12 1/2" block
  • (4) -- 3 7/8" squares
  • (5) -- 3 1/2" squares
  • (1) -- additional 3 7/8" square, then cut in half once diagonally to make (2) small triangles
From Fabric B -  Cut the following for each 12 1/2" block
  • (3) -- 3 7/8" squares
From Fabric C - Cut the following for each 12 1/2" block
  • (1) -- 3 7/8" square
  • (1) -- 6 7/8" square.  Cut square once diagonally to make (2) large triangles.  You will use (1) and have (1) left over to use for your block buddy's block)

Piecing the Basket Block

Use a 1/4" seam allowance when making the Basket Block.  Place "right" sides of material together for sewing and match the raw edges.  If necessary, secure fabric with straight pins to avoid slipping.

Constructing the half square triangles
  • Place a 3 7/8" Fabric A square with a 3 7/8"  Fabric B square right sides together
  • Using a ruler draw a diagonal line from one corner to the next on the wrong side of the fabric
  • Stitch a line 1/4" from each side of the diagonal line
  • Cut on the diagonal line you drew to separate into two 3 1/2" finished half square triangles
  • Repeat until you have completed (6) half square triangles
  • Bet you feel like a pro constructing these half square triangles by now! (smile)
  • Press the seams of your finished half triangle squares to the darkest side of the fabric
  • Repeat using remaining Fabric A 3 7/8" square and Fabric C 3 7/8" square to make (2) half triangle squares
Half Square Triangles - with Dog Ears

Don't forget to trim your "dog ears" off the finished 3 1/2" half square triangles.

Assembling the Basket Block

The Basket Block is assembled by constructing seven units and then joining them together.
Let's get started, shall we?

Unit One
  • Arrange (1) -3 1/2" solid Fabric A square with (3) half square triangles made from Fabrics A & B.  Join each using a 1/4" seam allowance
Components of Unit 1


Unit 1

Construct Unit Two:
  • Arrange (3) Fabric C - 3 1/2" squares with (1) Fabric A & C half square triangles. 
  • Join using a 1/4" seam allowance
Components of Unit 2

Unit 2

Construct Unit Three:
  • Sew (1) Fabric A & Fabric B half square triangle and (2) small Fabric A triangles together using a 1/4" seam allowance.
  • Pay close attention to the direction each triangle is sewn to the half square triangle block
Components of Unit 3

Sewing Unit 3

Completed Unit 3

Construct Unit Four:
  • Sew Unit Three and (1) large Fabric C triangle together using a 1/4" seam allowance
Components of Unit 4


Completed Unit 4


Construct Unit Five:
  • Sew (2) Fabric A & B half square triangle blocks together using a 1/4" seam allowance
Components of Unit 5


Construct Unit Six:
  • Sew (1) Fabric A & Fabric C half square triangle block and (1) Fabric A -3 1/2" square together using a 1/4" seam allowance
Components of Unit 6

Construct Unit Seven:
  • Sew Unit 4, 5, and 6 together as shown below using a 1/4" seam
Components of Unit Seven
Unit Seven
Assembling the Block:
  • Sew Unit 1, Unit 7, and Unit 2 together as shown below using a 1/4" seam allowance to complete the Basket Block
Units 1 & 7


Joined Units 1 & 7 with Unit 2

Completed Basket Block

After completing the Basket Block,  I have to admit, I wondered why I had not taken time to construct one before.  It was a fun block to construct, went together rather easily, and made a classic block design.  I will be curious to learn what you all think about this block.  How will you take the pattern and make it your own through fabric selection and creativity?

I truly hope that you are all having fun learning this new skill and that you are finding a love for the art of quilting.  Remember, piecing blocks is the first step.  Once we have gathered all our blocks we will piece them together with sashing to construct our Friendship Sampler quilt top and add batting and a backing then quilt the top to complete our sampler.   

I am excited to continue working through this project with you and hope that you are enjoying the process and that you find the instructions and blog helpful.  I would love your feedback and constructive criticism.  Don't be afraid to let me know if something isn't working well for you or if you need additional assistance or if you feel the process is too slow or too fast.  This blog is for you and your benefit.  Please let me know what I can do to make it better.

In Stitches,
Jan

Tuesday, April 3, 2012

Making New Friends & Learning New Skills - Week 3

Good day ladies!  How are your blocks coming?  Have you received your first block from your block buddy as yet?  I don't know about you but I am looking forward to receiving my first block any day now!

The amazing thing about quilting is that not only does your time and effort result in beautiful works of art, but it can also lead to some pretty terrific friendships!

Please allow me to welcome the newest member of our quilting journey, April!  April has decided to join us and I am estatic that she is!  I met April just this past weekend at my favorite store -- yep, JoAnn Fabrics.  We met by chance when she asked if I was a quilter and the conversation started from there and lead to our project.  April is a welcome addition and I am looking forward to getting to know her better as I hope you are as the weeks progress.

Today we begin Block Three -- can you believe it!  See how time flies when you are quilting?!?

I am excited for us to begin this block as it will introduce a new element in our piecing, the half block square.  A half block square is a very simple design element that will add dimension to our project.
The fun thing about these blocks is that once you learn the basics of the block construction you can experiment with the design and incorporate more or less fabric prints into the final piece.

For the Churn Dash Block you will use four fabric selections.  For this block I chose fabrics in greens and blues.  The end result was very cheery!


What colors will you choose for your block?  How do you choose your colors? Do you wait to see the pattern first and how the block looks before selecting fabric or did you select fabric previously and will use it for the block?  I have to be honest, my mother laughs at me each week when we visit the fabric store.  Why? Because as I stroll through aisle after aisle of beautiful fabric I listen for the fabric to "speak to me".  Now, I am not CrAzY (maybe just a little) and I don't hear voices in my head (often) but I am a firm believer that fabric speaks to you.  It screams "pick me, pick me!" and in the end, the fabric that speaks the loudest is usually the fabric that goes home with me.  Well, it and a few more selections.

Let's get started on our block - shall we?

First the cutting. For the Churn Dash Block we will use four fabrics -- Fabric A, Fabric B, Fabric C, and Fabric D. 

Label your fabrics (mentally or on your pattern instructions) and cut the following:
  • Fabric A - (2) large squares 4 7/8" x 4 7/8" and (1) small square 4 1/2" x 4 1/2"
  • Fabric B - (4) rectangles 4 1/2" x 2 1/2"
  • Fabric C - (4) rectangles 4 1/2" x 2 1/2"
  • Fabric D - (2) large squares 4 7/8" x 4 7/8"
  • Remember, you will cut this quantity for each block and you are constructing (2) blocks - one for you and one for your block buddy

First we will construct our half square triangles and our half block squares, then we will assemble the units into our three rows that comprise the block.

Are you becoming a pro at assembling the half square triangles yet?  Mastering the half square triangles opens a world of versatility when constructing quilt blocks and quilt designs.
  • Construct four half square triangles by placing (1) Fabric A and (1) Fabric D 4 7/8" square right sides together and using a ruler mark a diagonal line from the upper left hand corner to the lower right hand corner of the square on the "wrong side" of the fabric.
  • Stitch a 1/4" seam on each side of the drawn line
  • Separate the units by cutting along the drawn line.
    Construct four half block squares:
  • Place (1) Fabric B and (1) Fabric C  - 4 1/2" x 2 1/2" rectangle right sides together
  • Join by stitching a 1/4" seam to form a half block square.
  • Repeat until you have constructed four half block squares


Completed Half Block Square

Once you have constructed all the half square triangles and the half block squares, press your seams to avoid lumping and bulk in your finished block and then we will assemble the rows that comprise our block.

The Churn Dash Block is comprised of three rows.  For the first row you will join (2) half square triangles with a half block square unit between them.

 
Layout for Row One

Row One- Assembled

For the second row you will assemble the row using (2) half block squares with (1) plain 4 1/2" square in the center.  Pay close attention to the direction of your half block squares for proper pattern flow.

Row Two - Assembled

 
Assemble row three by joining the remaining (2) half square triangles with the remaining (1) half block square. 
Assembly Layout for Row 3

Once all three rows have been assembled you can begin assembling the final block by joining rows one and two - using a 1/4" seam allowance and finally adding row three to the bottom of row two using a 1/4" seam allowance.

Assembling the Block by Joining the Rows

Completed Churn Dash Block
Isn't quilting fun?  I hope you are all enjoying this project so far and that you are finding an appreciation for the art of quilting.  I would love to see some of your finished blocks, please email me pictures as you are able and I will share them with eveyone.

Be on the lookout for block buddy assignments, block instructions and templates in your emails later today for the Churn Dash Block and happy stitching ladies!
As Always, In Stitches,
Jan


Monday, April 2, 2012

Block 2 - Double X

Ladies, please allow me to apologize for the delay in getting Block 2 posted.  I have been a bit under the weather but am feeling somewhat better and ready to get caught up!

How has your sewing been going?  Have you attempted Block 2 without the blog showing the step by step in pictures?

For me, Block 2 was a lesson in material selection and how it affects the final look of the block.
For the instructional pictures you will see the original material I chose.  After completing the block I was very unhappy with the look and decided to change materials and redo the block.  I will post a picture of my final block -- I was quite pleased with it!

The Double X Block is a great compliment to our first block, the Hour Glass Block, and was chosen to strengthen our skill levels in working with half-square triangles and alignment of the individual blocks that comprise the rows which makeup our block.

The Double X Block, created by Janet Wickell, is easily pieced using three plain squares and six half square triangles.  Our blocks will measure 12 1/2" square when completed.

For this block, my original material choice was comprised of soft lavendar and white fabrics as shown in the completed block below:
Double X Block

For our Double X Block- I labeled my fabric as such:
Fabric A - lavendar and white stripped material
Fabric B -- lavendar with small white vine print material

For cutting the material, you will need the following:
Fabric A -- (3) 4 7/8" squares, (3) 4 1/2" squares
Fabric B -- (3) 4 7/8" squares

As you did in block one, make sure the fabric you are using is clean and pressed with edges matching.
Pin your templates to your fabric carefully placing them to maximize your cutting space.
All seam allowances will be 1/4" seams.

Begin the block by constructing the half square triangles just as you did for the Hour Glass Block
  • Place (1) Fabric A 4 7/8" square with (1) Fabric B 4 7/8" square -- Right Sides Together.
  • With a ruler, draw a diagonal line from the upper left corner of your squares to the lower right corner on the "wrong side" of your fabric
  • Stitch a 1/4" seam on each side of the line
  • Separate your squares apart by cutting up the drawn line
  • Press the seams to the darkest side of your fabric
  • Repeat until you have constructed all six of the half square triangles


  •  Trim the ears off your completed half square triangles
Half Square Triangle with Dog Ears Showing
Dog Ears Trimmed


Once you have constructed all the half square triangles, begin assembling the rows

Construct Row One
  • Join (2) half square triangles using a 1/4" seam with the point of the Fabric B triangles pointing downward as shown
  • Add (1) 4 1/2" Fabric A square to complete the row

Row One - Assembled

Construct Row 2
  • Join (1) half square triangle with the Fabric B triangle point downward to the right (as shown) with (1) 4 1/2" block from Fabric A
  • Add (1) half square triangle with the Fabric B triangle pointed upward to the left
  • 


Assemble Row 3
  • Join (1) Fabric A 4 1/2" square with (1) half square triangle with the Fabric B triangle pointed upward to the left
  • Join the remaining half square triangle with the Fabric B triangle pointed upward to the left to finish the row


Row Two - Assembled

 Once all the rows have been assembled press the seams for each row and assemble the block by pinning row one to row two, right sides together and butting the seam intersections for a perfect match.  Join using a 1/4" seam.  Join row three to rows one and two in the same manner.

Securing Rows with Pins (Butt Seams for Perfect Match)

Adding the Last Block to Row Three

Rows One and Two Joined - Adding Row Three

Joining Rows

Double X Block - Take One


As I mentioned earlier, fabric selection plays a major role in the final look of your blocks.  Separately, I loved this fabric for its soft and sweet appeal but once I constructed the Double X block, I found that I did not like it together for this block style.  In my opinion the colors almost blend into each other too much and there is not enough of a dramatic effect.  While the block is pretty and can be used for projects with a soft subtle appeal (such as a baby quilt), I just wasn't satisfied with it for our friendship sampler.

With that in mind, I went back to the drawing board, or should I say my fabric stash and found materials I liked better for this block design.  I chose a fabric with a yellow background adorned with green vines and pink roses and for my second fabric (fabric B) I chose a green fabric with small print.  The result was much more to my liking!
Rethinking My Fabric Selection

Final Double X Block

I would love to see pictures of your blocks! Please feel free to email them to me at JanEgirl67@sssnet.com as an attachment -- I can then share them with our Stitching Friends!

Be on the lookout for Block Three coming your way very soon!

Are you having fun learning how to quilt ladies?  Do you find the instructions/blog helpful?  What can I do better to help you?  Your feedback is appreciated so let me know!

In Stitches,
Jan